2026 Top Pneumatic Right Angle Drill Buying Guide?
Choosing the right Pneumatic Right Angle Drill in 2026 requires more than comparing price tags. Workshop results depend on torque, speed control, air demand, and head design. A compact tool may reach tight frames, cabinet corners, and vehicle panels more easily. However, small dimensions can reduce grip comfort during extended drilling.
This buying guide examines specifications that matter in real working conditions. We consider operating pressure, average air consumption, chuck capacity, gear durability, and trigger response. We also examine how the drill feels beside a crowded engine bay. A swivel air inlet can prevent hose twisting. A rubberized handle may reduce vibration during repeated holes. These details often decide whether a tool remains useful after months of service.
Do not trust free speed alone. Higher RPM is not automatically better. Thin aluminum, hardwood, and steel require different drilling approaches. The best choice should match your compressor’s delivered airflow, not its advertised tank size. Manufacturer instructions, verified test data, and recognized safety certifications deserve careful attention. Product listings can be incomplete, and some specifications may conflict. That is worth checking.
A practical comparison should also include maintenance access, replacement parts, warranty terms, and noise exposure. Experienced technicians often value balance over impressive numbers. I have found that a slightly slower drill can feel more controlled in awkward positions. It may also produce cleaner holes. Still, every workshop has different priorities. This guide helps buyers question attractive claims, compare evidence, and select a dependable pneumatic tool for professional or serious home use.
What Is a Pneumatic Right-Angle Drill?
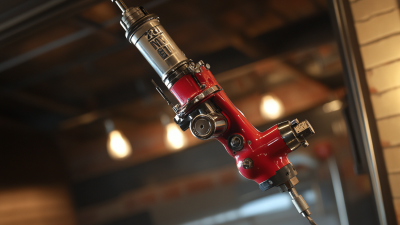
A pneumatic right-angle drill is a compact power tool designed for drilling in narrow spaces.
Instead of an electric motor, it uses compressed air to drive a vane or piston motor. The motor transfers rotation through gears to a chuck positioned about 90 degrees from the handle. This layout helps the operator reach between frames, inside cabinets, and beneath vehicle panels.
It is compact.
The tool is often lighter than comparable electric models, but it requires an air compressor, hose, and suitable fittings. Exhaust air may cool the housing, yet it can also increase noise near the operator.
In practical workshop use, this drill performs well during repeated hole-making and light fastening tasks. Mechanics often use it in confined spaces. Its performance depends on air pressure, airflow volume, hose diameter, and bit condition. A narrow hose may reduce speed and torque, even when the compressor appears powerful.
Before drilling, check the chuck, trigger, exhaust direction, and hose connection. Use the recommended bit, wear eye and hearing protection, and keep both hands ready for sudden resistance.
Lubrication matters. However, lubrication guidance varies by tool design, so guessing can cause damage. A common buying mistake is choosing the highest speed without considering control. Fast rotation does not always mean better drilling. If balance, grip, or access feels awkward, the tool may become tiring quickly.
I would question any specification that ignores these practical details.
How Pneumatic Right-Angle Drills Work and Where They Are Used
2026 Top Pneumatic Right-Angle Drill Buying Guide
A pneumatic right-angle drill converts compressed air into rotary motion. Air enters a vane motor and spins an internal rotor. Gears then reduce speed and increase usable torque. The angled head transfers rotation through a compact gear set. This layout reaches narrow spaces where a straight drill cannot. It also spreads the operator’s wrist angle more comfortably during repeated work.
The U.S. Department of Energy reports that compressed-air systems can consume 10–30% of industrial electricity. That makes air efficiency important, not decorative. A drill’s air demand, usually measured in CFM, should match the compressor and hose capacity. Pressure loss can reduce speed, torque, and drilling consistency.
In practice, these tools serve aircraft assembly, vehicle production, metal cabinets, and repair areas. They work especially well near frames, rails, and crowded panels. Still, the tool may stall under heavy load. That detail is easy to overlook.
Tips:
Check rated pressure, average CFM, chuck capacity, and head clearance. Use a short, suitable hose and inspect fittings for leaks. Compressed Air Challenge guidance identifies leakage control as a major efficiency opportunity. Lubricate the air motor according to the maintenance instructions. Wear eye and hearing protection. Test the drill on scrap material first. Sometimes, a slower feed produces a cleaner hole.
Key Specifications to Compare Before Buying
2026 Top Pneumatic Right Angle Drill Buying Guide: Key Specifications to Compare Before Buying
A
pneumatic right angle drill should match your workshop’s air system, not just your project list. Check the required air pressure, usually measured in bar or PSI, and compare air consumption under load. A small compressor may run continuously with a high-consumption drill. That creates heat, pressure drops, and uneven drilling.
Speed matters, but higher RPM is not automatically better.
Thin sheet metal may need fast rotation, while hardwood or larger bits require stronger torque. Confirm the recommended chuck capacity and bit compatibility. A 10 mm chuck suits many general tasks, but heavier work may need more capacity. Inspect the angle head, too. A compact head can reach narrow spaces, yet an extremely short design may reduce hand clearance.
Weight and balance become obvious after several minutes overhead. Choose a model with a comfortable trigger and a textured grip. Exhaust direction also matters; air blowing toward your hand becomes irritating during repeated use. Look for stated noise and vibration figures from dependable technical documentation, not vague advertising claims. I once focused too much on RPM and overlooked the drill’s air demand. That mistake slowed the entire workstation. No tool is perfect. Lubrication needs, service access, and replacement parts should be checked before purchase. A durable housing helps, but poor maintenance can still damage internal vanes and bearings. Test the drill with your actual hose, fittings, and bits when possible. Small compatibility problems often appear only after installation.
How to Choose the Right Drill for Your Application
2026 Top Pneumatic Right Angle Drill Buying Guide: How to Choose the Right Drill for Your Application
Choosing a pneumatic right angle drill starts with the workpiece, not the tool’s appearance. Measure the available clearance around the hole. A compact head helps inside cabinets, vehicle frames, and narrow metal channels. Check the required hole size, material hardness, and drilling depth. Aluminum needs different control than stainless steel. I once selected a lightweight drill for repeated steel work. That shortcut was wrong. The motor overheated, and the operator tired quickly.
Match the drill’s torque and speed to your application. Higher speed suits small holes and softer materials. Lower speed offers better control for larger holes. Confirm the operating air pressure and airflow from your compressor. A weak air supply can reduce speed and create uneven results. Review the chuck capacity, exhaust direction, trigger response, and handle shape. These details affect accuracy during long shifts. Choose a model with balanced weight, especially when drilling above shoulder height. Test the grip if possible.
Tips: Record your common hole sizes before comparing tools. Leave room for the fitting and air hose. Use clean, dry air and inspect connections regularly. Do not judge performance from free speed alone. Actual drilling load matters more. Try a short sample cut first. It may reveal vibration, poor access, or a control problem that specifications miss.